
Embedding PowerApps As A Web Part On SharePoint Page

It is now possible to embed PowerApps into SharePoint Online pages as web parts using iframes. The PowerApps and the SharePoint Site (where the app is to be embedded) need to be part of the same Office 365 Tenancy.
Although an app with mobile layout can be embedded on the SharePoint page, for better usability and look-feel, it is recommended to create an app with tab layout.
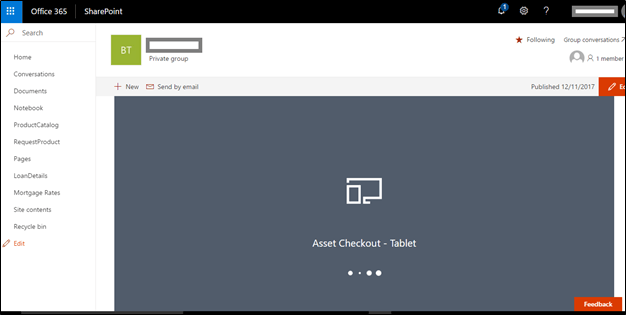
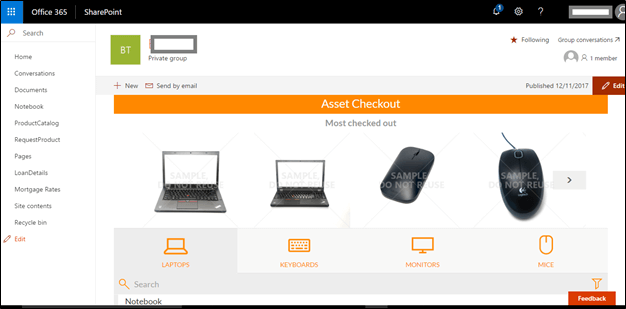
I have used the ‘Asset Checkout’ tab layout default template from PowerApps to create the app.
  • To embed the app in a SharePoint Page, we will need to generate the embeddable URI for the app. For this, get the App id. Go to the app details page on web.powerapps.com and the app id will be listed as a GUID on the app's details page.
SharePoint

SharePoint
  • The iframe code is as follows - 

    <iframe width="98%" height="98%" src="https://web.powerapps.com/webplayer/iframeapp?hideNavBar=true&source=iframe&screenColor=rgba(104,101,171,1)&appId=/providers/Microsoft.PowerApps/apps/[yourAppID]" />
    • The width and height propertiesare set to 98%, to ensure that there is no grey background area around your app.
    • hideNavBar - It is a Boolean which controls whether the PowerApps header is visible or not.
    • screenColor- controls the loading screen color while the app loads
  • Create a page on your SharePoint Site and embed the above code using the "Edit" mode.
  • You will be able to access PowerApps from your SharePoint Page.

    SharePoint

    SharePoint
This is not the final version of the capability and it is expected that the Microsoft team will bring in a better way to do this in future.

Comments

Popular posts from this blog

Get App Expiry Dates using Powershell

Step 1: Connect-MsolService Step 2: $applist = Get-MsolServicePrincipal -all  |Where-Object -FilterScript { ($_.DisplayName -notlike "*Microsoft*") -and ($_.DisplayName -notlike "autohost*") -and  ($_.ServicePrincipalNames -notlike "*localhost*") } Step 3: foreach ($appentry in $applist) {     $principalId = $appentry.AppPrincipalId     $principalName = $appentry.DisplayName     Get-MsolServicePrincipalCredential -AppPrincipalId $principalId -ReturnKeyValues $false | ? { $_.Type -eq "Password" } | % { "$principalName;$principalId;" + $_.KeyId.ToString() +";" + $_.StartDate.ToString() + ";" + $_.EndDate.ToString() } | out-file -FilePath d:\appsec.txt -append }

Bulk Import Excel Data to SharePoint List Using PowerShell and PnP

  Managing large datasets in SharePoint can be tricky, especially when you're dealing with Excel files and need to avoid list view threshold issues. In this guide, I’ll walk you through a PowerShell script that efficiently imports data from Excel into a SharePoint Online list using PnP PowerShell — with batching support for performance. Prerequisites Make sure you have the following before running the script: SharePoint Online site URL Excel file with data properly formatted PnP PowerShell module installed ( Install-Module PnP.PowerShell ) Appropriate SharePoint permissions What the Script Does Connects to your SharePoint site Loads and reads an Excel file Converts Excel date values Batches records in groups (to avoid the 5000 item threshold) Adds the items to your SharePoint list or library Logs execution time PowerShell Script $siteUrl = "[Site Collection URL]" Connect-PnPOnline -Url $siteUrl -UseWebLogin # Capture the start time $startTime...

๐Ÿš€ Essential SPFx (SharePoint Framework) Commands for Every Developer

Whether you're new to SharePoint Framework (SPFx) or a seasoned pro, having a go-to list of core commands can significantly improve your development workflow. In this post, we'll walk through the most important SPFx CLI commands—from setting up your environment to packaging and deploying your solution. ๐Ÿ› ️ Setting Up Your SPFx Project Start by scaffolding a new project using the Yeoman generator provided by Microsoft. Make sure Node.js and npm are installed before you proceed. yo @microsoft/sharepoint After scaffolding the project, install all dependencies: npm install To update dependencies later: npm update ๐Ÿ” Trusting the Development Certificate If you're using the local workbench, you need to trust the developer certificate for HTTPS support: gulp trust-dev-cert ๐Ÿงช Running the Local Workbench To build and serve your project locally, use: gulp serve This command starts a local server at: https://localhost:4321/temp/workbench.html You can also test your solution in ShareP...